Have you ever felt overwhelmed by constant noise? Whether it’s the hum of traffic or loud conversations, noise pollution can take a toll on your health and focus. Over 20 million Americans face dangerously loud environments daily, and even kids aren’t spared—5 million teens have hearing loss linked to noise exposure. That’s where cabine e box insonorizzati come in. These soundproof cabins create a peaceful space, improving well-being and productivity.
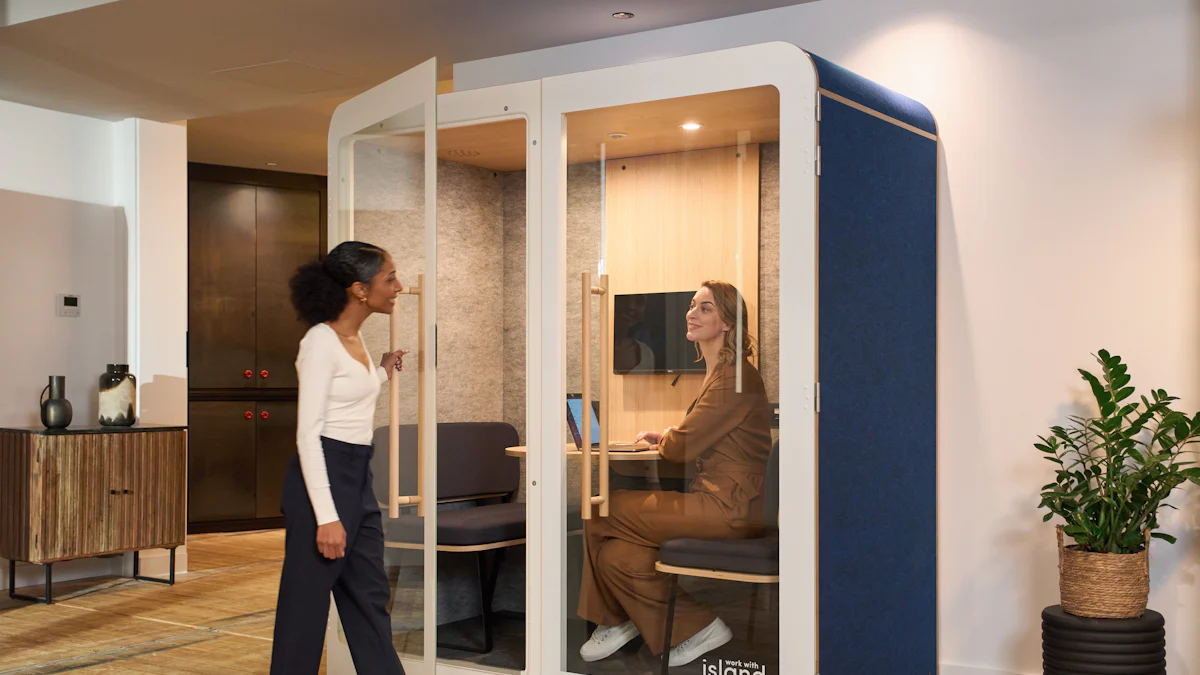
I’ve seen how a Sound-Proof Booth for 4 Person – CM-Q3L can transform a noisy office into a hub of focus. For larger teams, the Sound-Proof Booth for 6 Person – CM-Q4L offers the same benefits on a bigger scale. Fornitore: Cheerme provides top-notch solutions that help reduce stress and enhance communication.
Key Takeaways
- Pick a good spot for your soundproof cabin. Find noisy areas and put the cabin far from them for better results.
- Use top-quality soundproof materials. Things like acoustic foam and heavy vinyl block sound well.
- Make a clear plan before building. This prevents errors and makes sure the cabin has proper airflow and setup.
Choose the Right Location for Cabine e Box Insonorizzati
Choosing the right spot for your soundproof cabin is like picking the perfect seat in a movie theater—it can make or break the experience. Let me walk you through what to consider.
Evaluate noise sources and proximity to external disturbances.
Start by identifying where the noise is coming from. Is it a busy street, a loud factory, or maybe even a chatty office next door? You’ll want to place your cabine e box insonorizzati as far away from these noise sources as possible. I’ve found that checking the ambient noise level in different areas helps a lot. Some spots might seem quiet at first but turn noisy during certain times of the day.
Don’t forget about other environmental factors. For example, temperature can affect the materials you use, and extreme conditions might reduce their effectiveness. Also, think about how the space will be used. If it’s for recording, you’ll need a quieter area than if it’s for casual meetings.
Ensure the area is structurally sound and stable.
Before you start installing, take a good look at the space. Is the floor level? Are the walls sturdy? A weak structure can lead to poor soundproofing and even safety issues. I always recommend sealing any cracks or gaps in the walls, floors, and ceilings before installation. This step not only improves sound isolation but also ensures the cabin stays secure over time.
If you’re setting up in a multi-story building, consider the weight of the cabin. Some floors might not support heavy structures, so double-check the load capacity. Trust me, it’s better to be safe than sorry!
Select High-Quality Soundproofing Materials
When it comes to soundproofing, the materials you choose can make all the difference. I’ve learned that investing in high-quality options not only improves performance but also saves you from costly upgrades later. Let’s dive into some of the best materials available.
Opt for materials like acoustic foam, mass-loaded vinyl, and soundproof drywall.
Here’s a quick rundown of materials I’ve found incredibly effective:
- Acoustic Foam Sheets: Great for absorbing sound waves, especially in recording studios.
- Mass-Loaded Vinyl (MLV): A thin yet dense material that blocks sound without adding bulk. It works wonders on walls, floors, and ceilings.
- Soundproof Drywall: This dense material acts as a solid barrier against noise. It’s heavier and pricier than regular drywall but worth every penny.
- Fiberglass Insulation: Affordable and versatile, it provides both sound and thermal insulation. Just remember to wear protective gear during installation.
- Green Glue Compound: Perfect for reducing sound transmission when sandwiched between drywall layers.
I’ve also seen people use carpets and padding to reduce floor noise. Adding dense boards like plywood to walls can further enhance soundproofing.
Prioritize materials with high STC (Sound Transmission Class) ratings for better performance.
When comparing materials, I always check their STC ratings. This rating measures how well a material blocks sound. Higher STC ratings mean better soundproofing. However, it’s not the whole story.
The STC rating system works well for common noises like speech or TV sounds. But it doesn’t account for low-frequency bass, which often causes the most trouble.
So, while STC ratings are helpful, I recommend combining materials to cover a broader range of frequencies. For example, pairing MLV with resilient sound channels can significantly reduce noise transfer.
Choosing the right materials might feel overwhelming, but trust me, it’s worth the effort. The right combination can turn a noisy space into a peaceful retreat.
Plan the Layout and Design of Cabine e Box Insonorizzati
Create a detailed blueprint or design plan.
Before you start building, you need a solid plan. I always recommend creating a detailed blueprint for your cabine e box insonorizzati. Think of it as your roadmap—it helps you avoid mistakes and ensures everything fits perfectly. Start by measuring the space where you’ll install the cabin. Double-check the dimensions to make sure there’s enough room for the structure and any additional features you want to include.
Next, sketch out the layout. Where will the door go? What about the windows? If you’re like me, you’ll want to consider how people will move around inside. A cramped design can make the space uncomfortable, so leave enough room for chairs, tables, or equipment.
I also suggest planning for future needs. Maybe you’ll want to add more soundproofing later or expand the cabin. A flexible design makes upgrades much easier.
Incorporate ventilation, lighting, and electrical needs into the design.
Ventilation and lighting are often overlooked, but they’re super important. Without proper airflow, the cabin can feel stuffy. I like to use soundproof ventilation systems that keep the air fresh without letting noise in or out.
For lighting, think about what the space will be used for. Bright lights work well for offices, while dimmer options are better for relaxation or recording. I’ve found that LED lights are a great choice—they’re energy-efficient and don’t generate much heat.
Don’t forget about electrical outlets. Plan where to place them so you can easily plug in equipment or devices. It’s a lot easier to include these during the design phase than to add them later.
By planning these details ahead of time, you’ll save yourself a lot of headaches during installation. Trust me, a well-thought-out design makes all the difference!
Prepare the Installation AreaClean and level the surface to ensure proper installation.
Before you start installing your soundproof cabin, you’ve got to prep the area. Trust me, skipping this step can lead to all sorts of headaches later. First, clean the surface thoroughly. Dust, debris, or uneven spots can mess up the installation. I like to use a vacuum or a damp cloth to make sure everything is spotless.
Next, check if the floor is level. Uneven surfaces can cause gaps, which let sound sneak through. Use a leveling tool to spot any dips or bumps. If you find uneven areas, fill them with a self-leveling compound. It’s quick and makes a huge difference.
Here’s a tip: gather the right tools and materials before you start. Some essentials include:
- Mass-Loaded Vinyl (MLV) for soundproofing layers.
- Mineral wool insulation to dampen noise.
- Resilient channels for reducing vibrations.
- Acoustic caulk for sealing gaps.
Having these on hand saves time and keeps the process smooth.
Seal cracks and gaps in walls, floors, and ceilings with acoustical sealant.
Cracks and gaps are like open doors for sound. You’ve got to seal them up tight. Start by inspecting the area. Look around door frames, window frames, electrical outlets, and even HVAC vents. These spots are common culprits for sound leakage.
Once you’ve found the gaps, clean the surfaces. Dirt or grease can stop the sealant from sticking properly. For small cracks, use acoustic caulk. It’s flexible and lasts longer than regular caulk. For larger gaps, insert a foam backer rod first, then apply the caulk.
Don’t forget the doors! Check the weatherstripping at the bottom. If it’s worn out, replace it. Adding a door sweep can block sound from slipping underneath. For extra soundproofing, hang a heavy moving blanket over the door.
By sealing everything properly, you’ll create a solid barrier against noise. It’s a bit of work, but the results are worth it.
Use Effective Insulation TechniquesInstall soundproof insulation between walls to dampen sound transfer.
When it comes to soundproofing, insulation is your best friend. I’ve seen how adding soundproof insulation between walls can make a huge difference. It’s like putting on noise-canceling headphones for your cabin. The right insulation doesn’t just block sound—it also improves comfort and energy efficiency.
Here’s why I always recommend it:
- It reduces noise levels, creating a peaceful environment.
- It helps control temperature by stopping drafts and heat loss.
- It even saves money on energy bills by keeping the space insulated.
- Some insulation materials also slow down fire spread, adding an extra layer of safety.
- Plus, it prevents moisture buildup, which keeps mold and mildew at bay.
I usually go for materials like mineral wool or fiberglass insulation. They’re easy to install and work wonders for soundproofing. Just make sure to wear gloves and a mask while handling them. Trust me, you don’t want to skip that step!
Add multiple layers of soundproofing materials for enhanced results.
If one layer of insulation is good, multiple layers are even better. Think of it like layering up on a cold day—the more layers, the better the protection. I’ve found that combining different materials can block a wider range of sounds. For example, I like to pair mass-loaded vinyl with acoustic foam. The vinyl blocks sound, while the foam absorbs it.
Another trick I use is adding a second layer of drywall with Green Glue in between. This creates a “sandwich” that stops sound from bouncing around. It’s a bit more work, but the results are worth it.
Here’s a tip: don’t forget the ceiling and floor. Sound travels in all directions, so insulating these areas can make a big difference. Adding carpets or rugs can also help reduce noise from footsteps.
By layering materials, you’ll create a soundproof cabin that feels like a private oasis. It’s all about building that perfect barrier against unwanted noise.
Focus on Door and Window Sealing

Use weatherstripping or acoustic seals to block sound leakage around doors.
Doors are one of the biggest culprits when it comes to sound leakage. I’ve learned that even the tiniest gap can let noise sneak through. That’s why sealing your doors properly is a must. Here’s what works best:
- Door Seal Kits: These cover all four sides of the door, giving you maximum soundproofing.
- Automatic Door Bottoms: These are my favorite! They use a flat spring mechanism to lower a neoprene seal against the floor whenever the door closes. No gaps, no noise.
- Door Jamb Seals: These come with a compress-o-matic design and a rubber gasket that absorbs sound. They’re great for creating a tight seal.
- Door Thresholds: These work wonders when paired with automatic door bottoms. They fix alignment issues and add an extra layer of soundproofing.
I always recommend checking for gaps around the door frame. If you spot any, fill them with acoustic caulk before installing these seals. Trust me, it makes a huge difference.
Tip: Don’t forget to replace worn-out weatherstripping regularly. It’s a small step that keeps your soundproofing effective over time.
Install double-glazed or laminated glass for windows to improve insulation.
Windows are another weak spot for soundproofing. I’ve found that double-glazed or laminated glass works like magic. Here’s why:
- They block external noise, creating a quieter and more comfortable space.
- Laminated glass is thicker and stronger, which helps dampen sound even more.
- They improve energy efficiency, keeping your cabin cozy while reducing noise.
Double-glazed windows have two layers of glass with a gap in between. This gap acts as a barrier, stopping sound waves from passing through. Laminated glass, on the other hand, has a special layer that absorbs sound vibrations. Both options are durable and long-lasting.
Note: If you’re upgrading your windows, make sure the frames are sealed tightly. Even the best glass won’t help if there are gaps around the edges.
By focusing on doors and windows, you’ll tackle two of the biggest sources of noise leakage. It’s a game-changer for creating a truly soundproof space.
Install Vibration Isolation PadsPlace isolation pads under the cabin or box to minimize vibrations.
Vibrations can be sneaky. They travel through floors and walls, turning into noise that ruins your soundproofing efforts. That’s why I always recommend using vibration isolation pads under your cabin or box. These pads are lifesavers when it comes to keeping things quiet.
Here’s how they work:
- They reduce vibrations from machinery or movement, stopping them from spreading to the structure.
- They prevent vibrations from turning into sound waves, which can escape your cabin.
- They work best when the cabin isn’t rigidly bolted to the floor. Bolts can bypass the pads and let vibrations sneak through.
I’ve seen how adding these pads can make a huge difference. They’re easy to install and don’t take up much space. Just place them under the corners or along the base of your cabin. You’ll notice the improvement right away.
Tip: Choose pads designed for the weight of your cabin. Heavier structures need thicker, more durable pads for the best results.
Use anti-vibration mounts for equipment inside the cabin.
If you’ve got equipment inside your cabin, like a generator or recording gear, vibrations can still be a problem. That’s where anti-vibration mounts come in. These mounts absorb the energy from vibrating equipment, keeping the noise under control.
When picking mounts, here’s what I look for:
- Weight capacity: Heavier equipment needs stronger mounts.
- Placement: Mounts work best when placed directly under the equipment’s contact points.
- Material: Rubber mounts are great for absorbing vibrations.
- Shape and size: The design affects how well they dissipate energy.
I’ve used these mounts for everything from air conditioners to studio monitors. They’re a simple fix that makes a big impact. By combining isolation pads and mounts, you’ll create a space that’s truly free from unwanted noise and vibrations.
Ensure Proper Ventilation Without Noise LeakageUse soundproof ventilation ducts or silencers to maintain airflow.
Ventilation is one of those things you don’t think about until it’s missing. Trust me, a soundproof cabin without proper airflow can feel like a sauna in no time. But here’s the tricky part—how do you keep the air fresh without letting noise sneak in?
I’ve found that soundproof ventilation ducts or silencers work wonders. These systems are designed to circulate air while keeping noise out. They’re like the secret weapon for maintaining comfort in a soundproof space. Here’s what makes them so effective:
- Specialized airflow systems: These advanced systems keep the air moving without creating noise.
- Climate control features: They help regulate temperature, which is a lifesaver in hot environments.
- Noise-minimizing design: The ducts and silencers block sound waves, so you don’t have to worry about noise leaking in or out.
If you’re installing one, make sure it’s the right size for your cabin. Too small, and it won’t circulate enough air. Too big, and it might compromise the soundproofing.
Avoid direct openings that could allow sound to escape.
Openings are like open invitations for noise. Even a small gap can ruin all your hard work. That’s why I always avoid direct openings in soundproof cabins. Instead, I use indirect pathways or baffles. These create a zigzag route for air, which blocks sound from traveling straight through.
Another tip? Seal every edge and joint around the ventilation system. Acoustic caulk works great for this. It keeps the airflow system airtight while stopping sound from slipping through.
By focusing on these details, you’ll get a cabin that’s both breathable and blissfully quiet.
Test the Soundproofing of Cabine e Box InsonorizzatiConduct sound tests to identify weak points in the installation.
Once your cabine e box insonorizzati is set up, it’s time to test how well it blocks sound. I like to start by playing loud music or using a noise generator outside the cabin. Then, I step inside and listen carefully. If I can hear anything, I know there’s a weak spot that needs fixing.
Some common trouble areas include:
- Electrical outlets installed back-to-back.
- HVAC vents or returns that aren’t sealed properly.
- Gaps around door frames or under the door.
- Windows with poor sealing.
- Structural connections that let sound travel between walls.
I’ve found that even small gaps can let noise sneak in. For example, a poorly sealed window can ruin all your hard work. That’s why I always double-check these areas during testing.
Tip: Use a decibel meter to measure sound levels inside and outside the cabin. This gives you a clear idea of how much noise is leaking through.
Make necessary adjustments or add extra layers to address issues.
If you find weak points, don’t worry—it’s easy to fix them. For small gaps, I use acoustic caulk or tape. These sealants work wonders for stopping sound leaks. For doors, I recommend installing heavy, solid-core doors with proper acoustic seals. Adding an airlock space with two doors can also boost soundproofing.
Windows might need double-glazing or laminated glass to block more noise. For HVAC vents, I’ve had great success with sound reduction products designed for ductwork. And if structural connections are causing problems, decoupling the soundproofed surfaces from the building’s frame can help.
Sometimes, adding extra layers of soundproofing materials is the best solution. For example, I’ve used mass-loaded vinyl and Green Glue to create additional barriers. These layers absorb and block sound, making the cabin even quieter.
By addressing these issues, you’ll create a space that’s truly soundproof. It might take a little extra effort, but the results are worth it.
Maintain and Inspect RegularlyCheck for wear and tear in seals, insulation, and materials.
Soundproof cabins aren’t a “set it and forget it” kind of thing. Over time, materials can wear out, and small issues can pop up. I always make it a habit to inspect my cabin regularly. It’s like giving your car a tune-up—it keeps everything running smoothly.
Here’s a quick checklist of what I look for during inspections:
| Component | Inspection Details |
|---|---|
| Door Seals and Gaskets | Check magnetic seals for proper contact, inspect gaskets for compression set, and verify cam-lift hinges. |
| Floating Floor Perimeter | Inspect the isolation gap around the floating floor for consistency and check areas near doorways and corners. |
| Window Systems | Check seals around laminated glass, look for condensation between panes, and test isolation mounts. |
I’ve noticed that door seals and gaskets are often the first to show wear. If they don’t fit snugly, sound can sneak through. Floating floors can also shift slightly, especially near corners. A quick check ensures everything stays in place.
Replace damaged components to maintain soundproofing effectiveness.
When I find something damaged, I don’t wait to fix it. A worn-out gasket or a cracked window seal might seem small, but it can ruin the cabin’s soundproofing. I’ve learned that replacing these parts right away saves me from bigger problems later.
For example, I once ignored a tiny gap in a door seal. Within weeks, the noise level inside the cabin increased noticeably. Replacing the seal fixed the issue instantly. Now, I keep spare materials like acoustic caulk and weatherstripping on hand. It makes repairs quick and easy.
Regular maintenance keeps your cabin performing like new. Trust me, a little effort goes a long way!
Installing cabine e box insonorizzati takes careful planning and attention to detail. I’ve seen how skipping steps like assessing room acoustics or choosing the wrong materials can lead to poor results. Ignoring indirect noise paths or misusing soundproofing techniques can also ruin your efforts. But when done right, the benefits are incredible. A well-installed cabin offers peace, privacy, and long-term durability. Follow these tips, and you’ll create a space that truly blocks out the noise.
FAQ
What is the best material for soundproofing a cabin?
I recommend mass-loaded vinyl. It’s dense, flexible, and blocks sound effectively. Pair it with acoustic foam for even better results.
How do I maintain a soundproof cabin?
Inspect seals, insulation, and materials regularly. Replace worn-out components like gaskets or caulk. A little maintenance keeps everything working perfectly.
Can I install a soundproof cabin by myself?
Yes, but it takes planning and patience. Follow the steps carefully, and don’t skip sealing gaps or testing for weak points.
Media Contact
Company Name: Ningbo Cheerme Intelligent Furniture Co., Ltd.
Email: Send Email
Country: China
Website: https://www.happycheerme.com/