Introduction
The holiday season is just around the corner, and what better way to get into the festive spirit than by creating your very own custom sublimation Christmas ornaments? Whether you’re a seasoned crafter or a beginner looking for a fun DIY project, we’ve got you covered. In this comprehensive guide, we’ll explore two fantastic methods for making personalized sublimation Christmas ornaments: using a sublimation printer and employing Infusible Ink. From designing your ornaments to the final product, we’ll walk you through the process, providing expert tips and insights along the way.
How to Use a Sublimation Printer to Create Christmas Ornaments
Sublimation Printing Basics
Before we dive into creating Christmas ornaments, it’s essential to understand the fundamentals of sublimation printing. Sublimation is a process in which heat and pressure are used to transfer ink onto various surfaces. To get started, you’ll need a sublimation printer, sublimation ink, heat-resistant tape, sublimation paper, and blank sublimation ornaments. Here’s a step-by-step guide:

-
Design Your Ornaments: Begin by creating your designs using graphic design software like Adobe Illustrator or Canva. Remember, the possibilities are endless, from traditional holiday motifs to personal family photos.
-
Print Your Designs: Load sublimation paper into your sublimation printer and print your designs. Ensure that you select high-quality settings to capture all the details.
-
Prepare Your Ornaments: While your designs are printing, ensure your blank ornaments are clean and dust-free. Wipe them down with a lint-free cloth to guarantee a smooth transfer.
-
Cut Your Designs: Trim your sublimation paper to match the size of your ornaments. Use heat-resistant tape to secure the design to the ornament, ensuring it’s flat and aligned correctly.
-
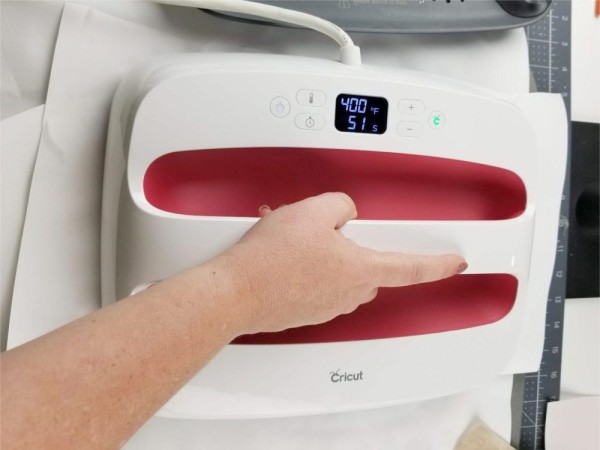
Heat Press Transfer: Preheat your heat press to the recommended temperature for sublimation (typically around 375°F or 190°C). Place your ornament with the design facing down on the heat press and cover it with a heat-resistant silicone pad.
-
Press and Wait: Once everything is set up, close the heat press and apply even pressure. The sublimation ink will turn into a gas, penetrate the ornament’s surface, and re-solidify, creating a permanent bond with the material. Keep the press closed for the recommended time (usually around 60 seconds).
-
Cool Down and Remove: After the timer goes off, open the heat press and let the ornament cool down for a few seconds. Carefully remove the design paper. Your custom sublimation Christmas ornament is now ready!
Using Infusible Ink for Christmas Ornaments
Understanding Infusible Ink
Infusible Ink is another fantastic method to create vibrant and long-lasting sublimation Christmas ornaments. Unlike traditional sublimation printing, Infusible Ink utilizes special markers or sheets infused with sublimation ink. Here’s how to use Infusible Ink to make your ornaments pop:

-
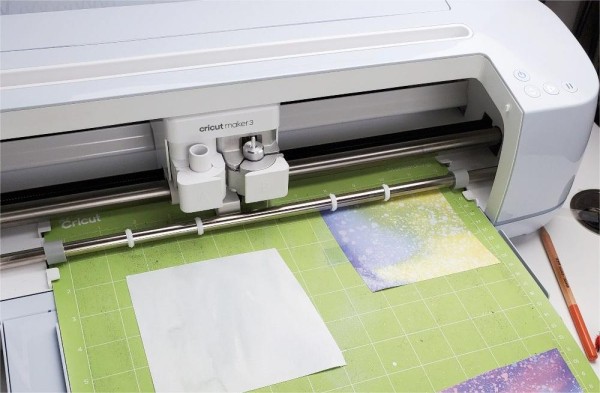
Design with Infusible Ink: Just like with a sublimation printer, start by designing your ornaments. However, with Infusible Ink, you have the option to use Infusible Ink markers or sheets. These are designed to provide a smooth and vibrant transfer onto compatible surfaces.
-
Color Your Design: With Infusible Ink markers, carefully color your design on a piece of compatible paper. Ensure that the design is mirror-imaged, so it transfers correctly.
-
Trim and Place: Once your design is ready, trim it to match the size of your ornaments. Position it on the ornament’s surface, ensuring it’s flat and securely taped down.
-
Heat Press Transfer: Preheat your heat press to the recommended temperature for Infusible Ink. Place your ornament with the design facing down on the heat press and cover it with a heat-resistant silicone pad.
-
Press and Wait: Close the heat press, apply even pressure, and set the timer as per the manufacturer’s recommendations. The heat press will transfer the sublimation ink from your design onto the ornament, creating a vibrant and permanent image.
-
Cool Down and Reveal: After the timer goes off, open the heat press and let the ornament cool for a short while. Carefully remove the design paper. Your customized Infusible Ink Christmas ornament is now complete!
Tips for Spectacular Sublimation Ornaments
Whether you choose to use a sublimation printer or Infusible Ink for your Christmas ornaments, these expert tips will ensure your creations stand out:
Tip 1: Quality Materials Matter Using high-quality sublimation ink, paper, markers, and blanks is essential. Lower-quality materials may result in faded or uneven transfers. Invest in good products for the best results.
Tip 2: Test, Test, Test Before creating your final ornaments, always run a test print or transfer on a scrap piece to ensure your design, settings, and alignment are perfect.
Tip 3: Heat and Pressure The success of sublimation lies in maintaining the right temperature and pressure. Follow the recommended settings for your specific materials and equipment.
Tip 4: Design Considerations When designing your ornaments, remember that bright and contrasting colors often yield the most impressive results. Experiment with different styles to discover what works best for you.
Tip 5: Protect Your Work Surface To avoid any mess, always work on a clean, protected surface. Sublimation ink and markers can bleed, so make sure your work area is well-prepared.
Tip 6: Use Compatible Blanks Ensure your blanks are compatible with sublimation or Infusible Ink. Not all materials can withstand the heat and pressure required for the transfer process.
Personalizing Your Christmas Ornaments
Personalization is the key to creating memorable Christmas ornaments. Whether you’re making ornaments for your own tree or to give as gifts, consider these personalization options:
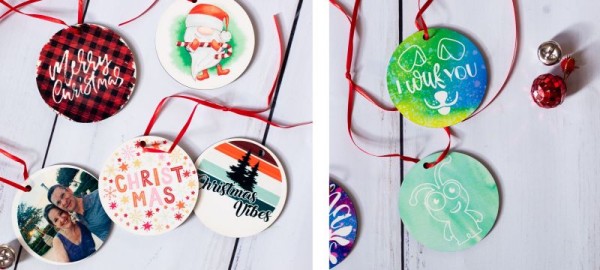
1. Family Photos: Create ornaments featuring cherished family photos. These make for wonderful gifts for grandparents or special mementos for your own tree.
2. Handwriting or Messages: Add a personal touch by using handwritten messages or notes. This is perfect for commemorating special events or adding a heartfelt message.
3. Custom Art: Express your artistic side by designing your own unique artwork or illustrations. This can be a fun and creative way to make ornaments that reflect your personal style.
4. Monograms and Initials: Simple monograms or initials can create elegant and timeless ornaments that fit any decor.
5. Pet Portraits: Include your beloved furry friends in your holiday celebrations with custom pet portraits. This is a unique way to remember your pets during the festive season.
Decorating with Your Sublimation Christmas Ornaments
Now that you’ve created your beautiful custom sublimation Christmas ornaments, it’s time to showcase them. Here are some creative ways to incorporate your ornaments into your holiday decor:
1. Christmas Tree Decor: The most traditional way to display your ornaments is, of course, on the Christmas tree. Mix them with your existing decorations for a personalized touch.
2. Gift Toppers: Attach your sublimation ornaments to presents as unique and reusable gift toppers. It’s a thoughtful touch that recipients will love.
3. Wreaths and Garlands: Incorporate your ornaments into wreaths and garlands for a festive and stylish look. They can be the focal point or added accents.
4. Window Hangings: Suspend your ornaments from windows using festive ribbon or string for a whimsical display that brightens up your home.
5. Table Centerpieces: Place your custom ornaments in a decorative bowl or vase as a centerpiece for your dining table. It’s a great conversation starter at holiday gatherings.
Caring for Your Sublimation Christmas Ornaments
Proper care ensures that your sublimation Christmas ornaments last for many holiday seasons to come. Follow these steps to maintain their vibrancy:
1. Gentle Cleaning: If your ornaments gather dust or dirt, gently wipe them with a soft, lint-free cloth. Avoid using abrasive materials or harsh chemicals that may damage the design.
2. Safe Storage: When the holiday season ends, pack your ornaments in a sturdy container with individual compartments to prevent scratches or damage during storage.
3. Avoid Direct Sunlight: Keep your ornaments away from direct sunlight to prevent fading. Storing them in a cool, dark place will preserve their colors.
Conclusion
Creating custom sublimation Christmas ornaments with your own designs is a fantastic way to add a personal touch to your holiday decor or to give heartfelt gifts to your loved ones. Whether you opt for a sublimation printer or Infusible Ink, the process is both rewarding and creative. With the right materials and a bit of imagination, you can craft ornaments that will be cherished for years to come. So, gather your supplies, unleash your creativity, and let your holiday spirit shine through your unique, personalized ornaments. Happy crafting!
Media Contact
Company Name: Sichuan Suber Technology Co.,Ltd.
Email: Send Email
Phone: 8615882271624
Address:No.56 Tianhui Middle Street
City: Chengdu
State: Sichuan, 610041
Country: China
Website: https://gobesin.com/

